Hanging anything substantial on your walls – a heavy mirror, a flatscreen TV, shelving units – requires more than just hope and a prayer. Driving a screw or nail straight into drywall alone is often a recipe for disaster, leading to items crashing down and leaving ugly holes behind. That’s where a humble yet essential tool comes into play: the stud finder. Understanding how these devices work and how to use them effectively is key to ensuring your wall-mounted items stay securely in place.
At its core, a stud finder does exactly what its name suggests: it helps you locate the vertical framing members hidden behind your finished wall surfaces. These supports, typically wooden studs (like 2x4s or 2x6s) or sometimes metal studs, provide the solid anchoring point needed for heavier loads. Drywall or plasterboard itself is relatively soft and brittle, not designed to bear significant weight directly.
Why Bother Finding Studs?
Think about the structure of a typical interior wall. You have the visible surface, usually painted drywall or plaster. Behind this surface lies a framework of studs, spaced at regular intervals. This framework is the skeleton of the wall, providing structural support. When you hang something heavy, you want the fastener (screw or lag bolt) to penetrate the drywall and bite firmly into the dense wood or metal of a stud.
Ignoring the studs and relying solely on drywall anchors for heavy items is risky. While some anchors are designed for drywall, they have weight limits, and improper installation or unexpected stress can still lead to failure. Drilling into a stud provides a vastly superior hold, preventing potential damage to your wall and belongings, and ensuring safety, especially with items mounted overhead or those that could cause injury if they fell.
Verified Info: Standard stud spacing in most modern residential construction is 16 inches ‘on center’. This means the center of one stud is 16 inches away from the center of the next. Less commonly, you might find 24-inch spacing, particularly in older homes or for non-load-bearing walls. Knowing this standard can help you predict where the next stud might be after finding the first one.
Decoding the Different Types of Stud Finders
Not all stud finders are created equal. They primarily fall into two categories: magnetic and electronic, with electronic models offering further variations.
Magnetic Stud Finders
These are the old-school, simplest type. They don’t detect the studs themselves but rather the metal fasteners (screws or nails) used to attach the drywall to the studs.
How they work: They contain one or more small, powerful magnets. As you sweep the finder across the wall, the magnet will be attracted to any ferrous metal close to the surface, typically the head of a drywall screw or nail embedded in a stud.
Pros:
- Inexpensive
- No batteries required
- Simple to use (in theory)
Cons:
- Can be less precise; they find the fastener, not necessarily the exact center or edges of the stud.
- Might miss studs if fasteners are set too deep, covered by thick plaster, or if metal studs were used with non-magnetic fasteners (less common).
- Can be easily confused by other metal objects in the wall, like corner bead, metal pipes, or conduits near the surface.
- Effectiveness varies greatly depending on wall construction.
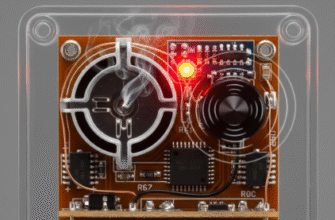
Electronic Stud Finders
These are more common today and use sensors to detect changes within the wall. They require batteries to operate.
How they work: Most electronic stud finders operate based on detecting changes in the dielectric constant of the wall. The dielectric constant is essentially a measure of how well a material can store electrical energy when subjected to an electric field. Drywall or plaster has a relatively uniform dielectric constant. When the finder passes over a denser object like a wooden or metal stud, the sensor detects this change in density (and thus, the dielectric constant). The device then typically indicates the presence of a stud with lights, sound, or both.
There are a few sub-types:
Edge Finders
These are the most basic electronic type. They sense the change in density that occurs at the edge of a stud. You typically need to slide the finder across the wall until it signals an edge, mark it, then continue sliding (or come back from the other direction) to find the other edge. The center of the stud lies between these two marks.
Pros:
- Widely available and relatively affordable.
- More reliable than magnetic finders on many surfaces.
Cons:
- Require calibration before each use.
- Can sometimes give false positives.
- Only finding the edges requires an extra step to determine the center.
- Accuracy can be affected by inconsistent movement speed.
Center Finders
These are a step up from edge finders. They use multiple sensors to analyze the density variations across a small area simultaneously. This allows them to more accurately pinpoint the center of the stud directly, rather than just the edges.
Pros:
- More convenient and often more accurate than edge finders.
- Clearly indicates the stud’s center, simplifying marking.
Cons:
- Generally more expensive than basic edge finders.
- Still require proper calibration and slow, steady movement.
Instant / Multi-Sensor / Deep Scan Finders
These represent the more advanced end of the market. They often incorporate a wider array of sensors or more sophisticated processing. Some models claim “instant” detection without needing to be slid across the wall (though some movement is often still beneficial). Many also include “deep scan” modes designed to work through thicker wall materials like plaster or double layers of drywall.
Pros:
- Potentially faster and easier to use.
- May offer better performance on difficult walls.
- Often include additional features like AC wire and metal detection.
Cons:
- Usually the most expensive type.
- Can still be fooled by irregularities or complex wall structures.
- Advanced features might require more careful interpretation of readings.
Mastering the Technique: How to Use an Electronic Stud Finder
While specific instructions vary by model (always read the manual!), the general process for using most electronic stud finders is similar:
1. Preparation: Install fresh batteries if needed. Ensure the wall surface is relatively clean and dry.
2. Calibration: This is perhaps the most crucial step. Place the stud finder flat against the wall in a spot where you are confident there isn’t a stud (usually a few inches away from where you intend to start scanning). Press and hold the power/activation button. The device will typically beep or flash its lights briefly as it calibrates to the density of the empty wall cavity. Do not move the finder while it is calibrating. Wait for the signal (often a steady light or a different beep) indicating calibration is complete.
3. Scanning: While still holding the button down (for most models), slowly slide the stud finder horizontally across the wall. Keep it flat against the surface; don’t rock or tilt it. Maintain a slow, consistent speed.
4. Marking: Watch the indicator lights or listen for the audible tone. * For an edge finder, it will signal when it detects the first edge of the stud. Mark this spot lightly with a pencil. Continue sliding until the signal stops (you’ve passed the stud) or slide from the opposite direction to find the other edge and mark it. The center is midway between your marks. * For a center finder, the device will typically indicate directly when its center aligns with the stud’s center. Mark this spot.
5. Verification: Don’t rely on a single pass. Repeat the scan slightly above or below your first mark to confirm the stud runs vertically. Once you’ve found consistent readings, you should have located the stud line. For extra certainty, especially before drilling large holes, experienced DIYers often use a very small finishing nail or an awl to gently probe the wall *at the marked location* to physically confirm hitting solid wood. If it pushes in easily, you missed; if you feel resistance, you’ve likely found the stud.
Important Warning: Many modern electronic stud finders also include modes to detect live AC wiring or metal pipes. Pay close attention to these warnings! Accidentally drilling into electrical wiring can cause severe injury or fire. Drilling into plumbing can lead to significant water damage. Always use these detection features if available and exercise extreme caution when drilling or cutting into walls.
Tips for Getting Accurate Readings
Using a stud finder effectively sometimes takes a bit of practice. Here are some tips:
- Calibrate Correctly: Always start calibration over an empty bay, not over a stud. If you get strange readings, try calibrating in a different spot.
- Go Slow: Moving too quickly is a common cause of missed studs or inaccurate readings. Slow and steady wins the race.
- Keep it Flat: Maintain firm, even contact between the finder and the wall surface throughout the scan.
- Textured Walls: Heavy textures can interfere with sensors. Try placing a thin piece of cardboard over the area and scanning through it – you may need a finder with a deep-scan mode.
- Lath and Plaster Walls: These older walls are notoriously difficult for electronic stud finders due to the irregular wooden lath strips behind the plaster and the varying density. A high-quality magnetic finder (looking for the nails attaching lath to studs) or a deep-scanning electronic model might work, but results can be inconsistent. Careful probing might be necessary.
- Know Standard Spacing: Once you find one stud, measure 16 inches (or sometimes 24) horizontally to find the likely location of the next one. Use the finder to confirm.
- Mark Vertically: Find the stud at one height, then scan vertically up and down a few inches to ensure you’ve located the continuous line of the stud, not just a small obstruction.
Troubleshooting Common Problems
Inconsistent Readings: Recalibrate in a different area. Check battery strength. Slow down your scanning speed. Ensure the finder is flat.
Finder Detects Nothing: Are you sure there are studs? (Most walls have them). Is it a lath and plaster wall? Try a strong magnetic finder or a deep scan mode if available. Batteries might be dead.
Finder Signals Everywhere: You might be near a corner with extra framing or metal corner bead. There could be metal ductwork, plumbing, or electrical conduit behind the wall. Use the AC/metal detection features if your finder has them, and proceed with extreme caution. Recalibrate away from the problematic area.
Secure Mounting Starts Here
A stud finder isn’t the most glamorous tool in the box, but it’s undoubtedly one of the most practical for anyone undertaking DIY projects that involve attaching things to walls. Taking the time to understand the different types, master the proper technique, and verify your findings will save you potential headaches, costly repairs, and ensure your shelves, pictures, and televisions stay exactly where you put them – safely and securely attached to the solid structure within your walls.